Fl Studio How To Quantize
Posted By admin On 18.09.19Global Snap Selector - Selects the Snap value applied to the Piano roll, Playlist and Event Editor when the local Snap (found on each of these windows) is set to 'Main'. Right-click the selector to select the default note length from the popup menu. Input quantizing - The settings on the Global snap determine MIDI. While FL Studio has taken steps to improve their live recording/editing/etc, all demo's I've seen dealt with music that was already composed and arranged.So it is kinda weird they don't have auto-quantize, at the same time, its not really a big deal since it literally takes a second to open the piano roll and hit the shortcut for a quick quantize.
Although FL Studio has a deserved reputation for being an application that beginners can pick and start making music with quickly, experienced users will tell you that it can also be a deep and involved beast.So here’s a collection of tips that takes you below the surface and deals with some FL Studio features that you might not be familiar with, but once mastered will speed up and improve your workflow.1. The secret volume controlA channel’s volume can be automated in the piano roll by right-clicking the grey box under the keyboard and selecting Channel volume.
This is useful for adding tremolo and subtle variations in levels, which isn’t easily doable using note velocities. It’s also great for adding an organic feel to a phrase. A consequence of automating the volume in this way, though, is that it adjusts the channel’s Volume knob in the step sequencer, which can be an issue when mixing.
A good fix is to use the Volume Multiplier knob in the Misc tab of the Channel Settings window to set the level before it gets to the Mixer.2. Split and merge patternsPatterns that contain notes on multiple channels can be split by channel, making it easy to build variations on a single pattern without having to clone it and edit the piano roll for each one. In the step sequencer, click the pattern selector and select Split by channel on the right. All of the notes and automation for each channel will appear in new patterns, named after each channel, stacked on top of each other in the Playlist. Patterns can be merged by selecting them in the Playlist and clicking Edit»Merge pattern clips in the Playlist options. Only the selected patterns will be merged – other instances of the selected patterns will stay as they are.3. Dumping the score logHow often do you find yourself playing something really awesome on your MIDI controller and wishing you’d had Record engaged (or a better memory)?
Even when not recording, FL Studio remembers all of the incoming MIDI notes from the last five minutes or so. To get that great riff back, go into an empty pattern and select “Dump Score Log To Selected Channel” from the Tools menu. Those MIDI notes will magically appear!4.
Set snapshots in the BrowserThe Browser can be organised by snapshots – specific locations accessible via number keys 1 to 5. To set up a snapshot, navigate to the location in the Browser that you want easy access to and click the Current Snapshot dropdown menu, next to the Browser label. Choose the number key you want to associate with this location and click that snapshot. You can also rename and freeze the snapshot. When you want to navigate to that location in the Browser, press the associated number key while the Browser is in focus.5. Scale automation clipsAutomation clips can have their minimum and maximum values scaled, enabling you to edit the depth of the automation without going through and tweaking each point in the clip.
In the Channel Settings window of the automation clip, the MIN and MAX knobs at the top will adjust the range of the automation clip. To the right of these knobs, the Timestretch knob can be used to adjust the clip’s timing and length.6. Scale note propertiesIn the piano roll, the velocity levels or other parameters of the currently selected notes can be scaled by pressing Alt+X. This affords you a lot of flexibility when it comes to adjusting note properties and can be very useful when a number of notes are too loud or too soft and you want to make them fit better without sacrificing their relative levels.7.
Zoom in closerTo set the resolution of FL Studio’s sequencer, select the project’s General settings from the main Options menu and change the Timebase (PPQ) value. Higher values will enable you to zoom in closer on notes and draw smaller ones more accurately, as well as being able to adjust the start and end points of the notes to a finer resolution.8. Slice up pattern clipsPattern clips in the Playlist can be sliced and rearranged. Using the Slicer tool (C), click and drag across a clip, or hold Shift and click to slice without dragging.
Fl Studio Quantize Shortcut

The new sections of the clip can be moved around as you see fit. Be careful when slicing a pattern: any notes that start before the slice will be omitted from the resulting piece. The slip tool (S) can come in handy for remedying this.9. Metronome customisationTo change the level of the metronome and the audio preview in the Browser, go into the Audio Settings window – which is accessed from the Options menu – and select a Mixer track with the Preview Mixer track selector. Now you can stay on beat to the sound of a less annoying tone.10. Smooth event editingTo quickly edit events smoothly in the piano roll or the event editor, enable Auto smoothing in the piano roll’s Options menu and edit the events with the pencil tool. Then set Snap to Step and draw in your automation.
Once that’s done, FL Studio will make the events smooth and rounded, rather than jerky and broken.11.Snap to eventsAt the bottom of the Snap to grid menu in both the piano roll and the Playlist is the Snap To Events option. With this enabled, notes and clips won’t snap to anything except the start and end points of pre-existing notes or clips. When the note or clip is at a point at which it will snap to another one, the other notes or clips will be coloured purple. This can be useful when you want to add notes to a phrase that isn’t strictly quantized without them overlapping, or when slicing audio in the Playlist.Original source:.
If you find yourself in that scenario, go to Tools from the main menu. In the third section, labeled “Score Logger,” you’ll see an option called “Dump score log to selected pattern.” Make sure you’ve selected the pattern and channel you want to recover you MIDI with. In previous versions of FL Studio, this option was only able to recover just a few minutes of your MIDI performance. Now, in FL Studio version 20, you have the option to recover 2, 5, 10, 20 or even a half hour worth of your previous MIDI input without recording.After recovering your MIDI, you might find there are still some things you’d like to alter to perfect the timing and overall performance.
First, you’ll want to select only the section of notes that you want to keep, or depending on how much time you recovered, it might be easier to select the notes you don’t want to keep and delete those. Once you’re left with only the notes you want to use, highlight all of your notes by pressing CTRL + A. Drag the first note into its proper position in the piano roll.Now you can adjust the timing of the notes with the quantization options. Click the magnet icon to select the snap settings you want to apply the quantization to for your note alignment. You can use SHIFT + Q to snap only the beginning of the notes to the grid, or use CTRL + Q to snap both the beginning and end of the notes to the grid. Another option that can fine tune the quantization is ALT + Q.Here, you can manually adjust the strength level of the quantization with the Start Time, Duration, and Sensitivity knobs. You can click the dropdown menu next to the Duration knob for the options to “Leave Duration,” “Leave End Time,” “Quantize Duration,” and “Quantize End Time.” You’ll also have the option to use preset templates from the menu above by clicking the folder to browse through quantization settings, or click the dropdown menu next to the folder to quickly select different preset templates.You can even add your own quantize templates by saving MIDI and adding it to any of these folders or making your own folder of presets.
Fl Studio How To Quantize A Track
FL Studio will use the timing of those MIDI notes, no matter the pitch, to determine the quantization settings applied to your new MIDI.Now you’ll never have to worry about losing a performance without the record button enabled. This will allow you to jam freely without worrying about deleting or undoing recordings over and over again. You’ll be able to simply play your MIDI controller and use the Score Logger’s “Dump score log to selected pattern” up to the last 30 minutes of your performance, which should leave you with more than enough time to recover anything you’ve played. Privacy OverviewWe use cookies and similar tracking technologies to track the activity on our Service and hold certain information.Cookies are files with small amount of data which may include an anonymous unique identifier. Cookies are sent to your browser from a website and stored on your device. Tracking technologies also used are beacons, tags, and scripts to collect and track information and to improve and analyze our Service.Read our full Privacy Policy here:View our Cookie Declaration here.
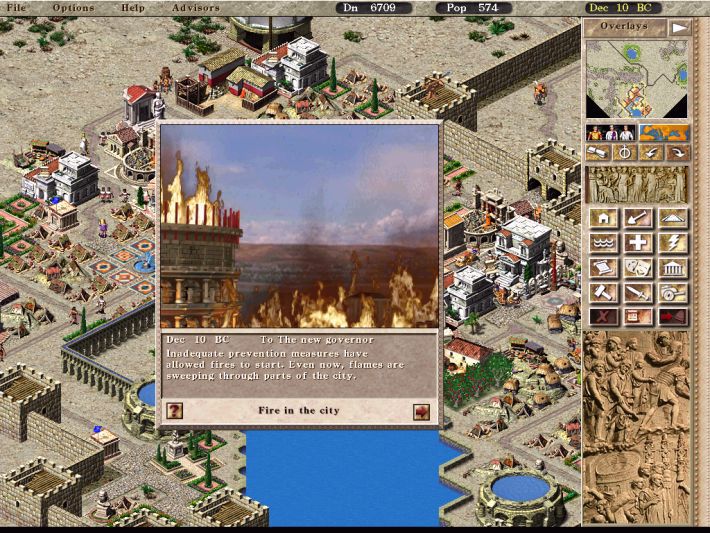 Caesar 3 Free Download PC Game Cracked in Direct Link and Torrent. Caesar 3 is a video game that was released on September 30, 1998, developed by Impressions Games. Don’t need Crack Caesar 3 (This is GOG version). Ave Caesar III. The new standard of city-building. The evolution of Caesar 3 is similar to Civilization II, with the cumulative effect of the improvements over past entries resulting in a much more engaging, enjoyable, and yes, addictive game. Aug 19, 2014 Caesar 3 Pc Full Download Caesar 3 374 M B As a provincial governor charged with spreading the glory of Rome your mission is clear – build cities, foster trade and industry, make money. Approximate download size 38 Mb Platform Browser. Dune 2 - Browser. Dune 2 - Android. Original classic game Caesar III was ported to many platforms, and now it is ported to work in browser. This version of the game appeared thanks to the open source project Caesaria which maintained by dalerank. Download Caesar III for free here. It's the game were you're to build Rome from scratch. Caesar III is a simulation game, where you as a player has to place the right buildings on free spots to construct a city. These buildings come alive and the city begins to evolve. As the city grows you'll experience new problems that have to be solved.